Pages

Thursday, January 12, 2012

Tutorial: How to make a Capri Sun Bag/Tote

               Supplies needed: 30 prepped pouches (see purse tutorial for directions on how to prep)
                                         thread (your choice of color)
                                         beverage (today I chose refrigerated tap water, yum) :)

Time to complete: approx 1 hour

First lay out your pouches in a design pleasing to you.  You'll use 8 pouches for the front, 8 for the back, 2 for each side (4 total), 3 for the bottom (use least desired pouches here), 3 for each strap (6 total), and 1 for a pocket (optional).

Feel free to change the dimensions of your bag & plan accordingly.


Once you're are happy with your layout, start sewing! :)

Make sure your settings are correct:   zigzag stitch, length- just under 1, width- just under the 3


 Starting with the top left pouch, overlap 2 pouches and stitch.  (I backstitch at the beginning and ends to ensure thread doesn't become undone.)


Add your next pouch moving to the right of your layout and continue until your top row is complete.

Now stitch the bottom row together as you did the top- left to right.
 Join the 2 rows together by over lapping the top row over the bottom and stitch.


Ta-da!!!  Pat yourself on the back. The front of your bag is done. :)

And take a drink.  You need to stay hydrated when crafting. :P

Now stitch together the back of the bag just as you did the front.

Beautiful!
Aren't you loving this?


Lay out the pouches you chose for the sides.  Stitch together, overlapping the top row over the bottom.

 On to the bottom of the bag!  Set your 3 pouches alongside the bottom of the front section of your bag so you can gauge where to overlap your pouches.  Stitch together.

Next we'll add the inside pocket.  This is optional, but I think it adds a nice touch, and then you'll have somewhere to keep your phone or your keys when you're out and about.


Decide where you want your pocket.
(I used to stitch it right over the other stitches, but when you stitch in the same place, it weakens the bag, leaving it prone to breakage.)
Stitch one side of the pocket.


 Push the pocket over and stitch, holding it in place.  It should look like an arch.
Carefully fold in the sides and push down the bottom of the pocket so it lays flat.  Stitch across.


Yay!  You now have a nice looking pocket. Feel free to add another if you like.

Yes, you can see the stitching on the front side, but it isn't that noticeable from faraway; Plus I think it adds a little character.  


We're now ready to start piecing the bag together.  Start by stitching the sides to the bottom with insides together and leaving a 1/4" gap at either end.

Likewise stitch the other side to the bottom, leaving a gap at both ends.


Can you see the gaps below?  You'll need them later in order to stitch up the sides of the bag.

Line up the front of the bag to the bottom section with the insides together.  Steal your daughters' barrettes to hold in place if you need to.  Stitch together, again leaving a 1/4" gap at both the beginning and end.  Stitch the back section of the bag to the bottom portion in the same fashion.


Occasionally  your sewing machine might get "stuck".  Just nudge your project forward as you sew as needed.  This usually is especially the case with the straps, which will come next.

Using your thumbnail on one side, and your hand pressed against on the inside, fold the bag up along the stitching to give it some shape.  This should make the bottom flat, allowing the bag to stand upright on it's own when assembly is complete.

 Woo hoo! The bottom is all stitched.
Put the bag aside for the moment, and let's do the straps.

Stitch 3 pouches together------>


Fold into thirds....


And stitch along each side, being careful to keep your seam straight.

Repeat for the other strap.


This part is optional, but you can add a center seam to your straps if you like. 
 I change the setting on my machine... 

 And stitch along the center of your strap. Repeat with the other strap.


Your straps are complete! ------>


Stitch the straps to the top of your bag, approx 1   1/2" from the edge.  
Make sure you stitch 2 rows to add strength and durability.

Watch where your straps line up- keep them even on both sides, and be aware of how you twist them when stitching the other end.
Repeat with 2nd strap on the other side.

Now on to the trickiest part of all tricky parts! 
 Our last and final step is to stitch up the 4 sides/edges of the bag.

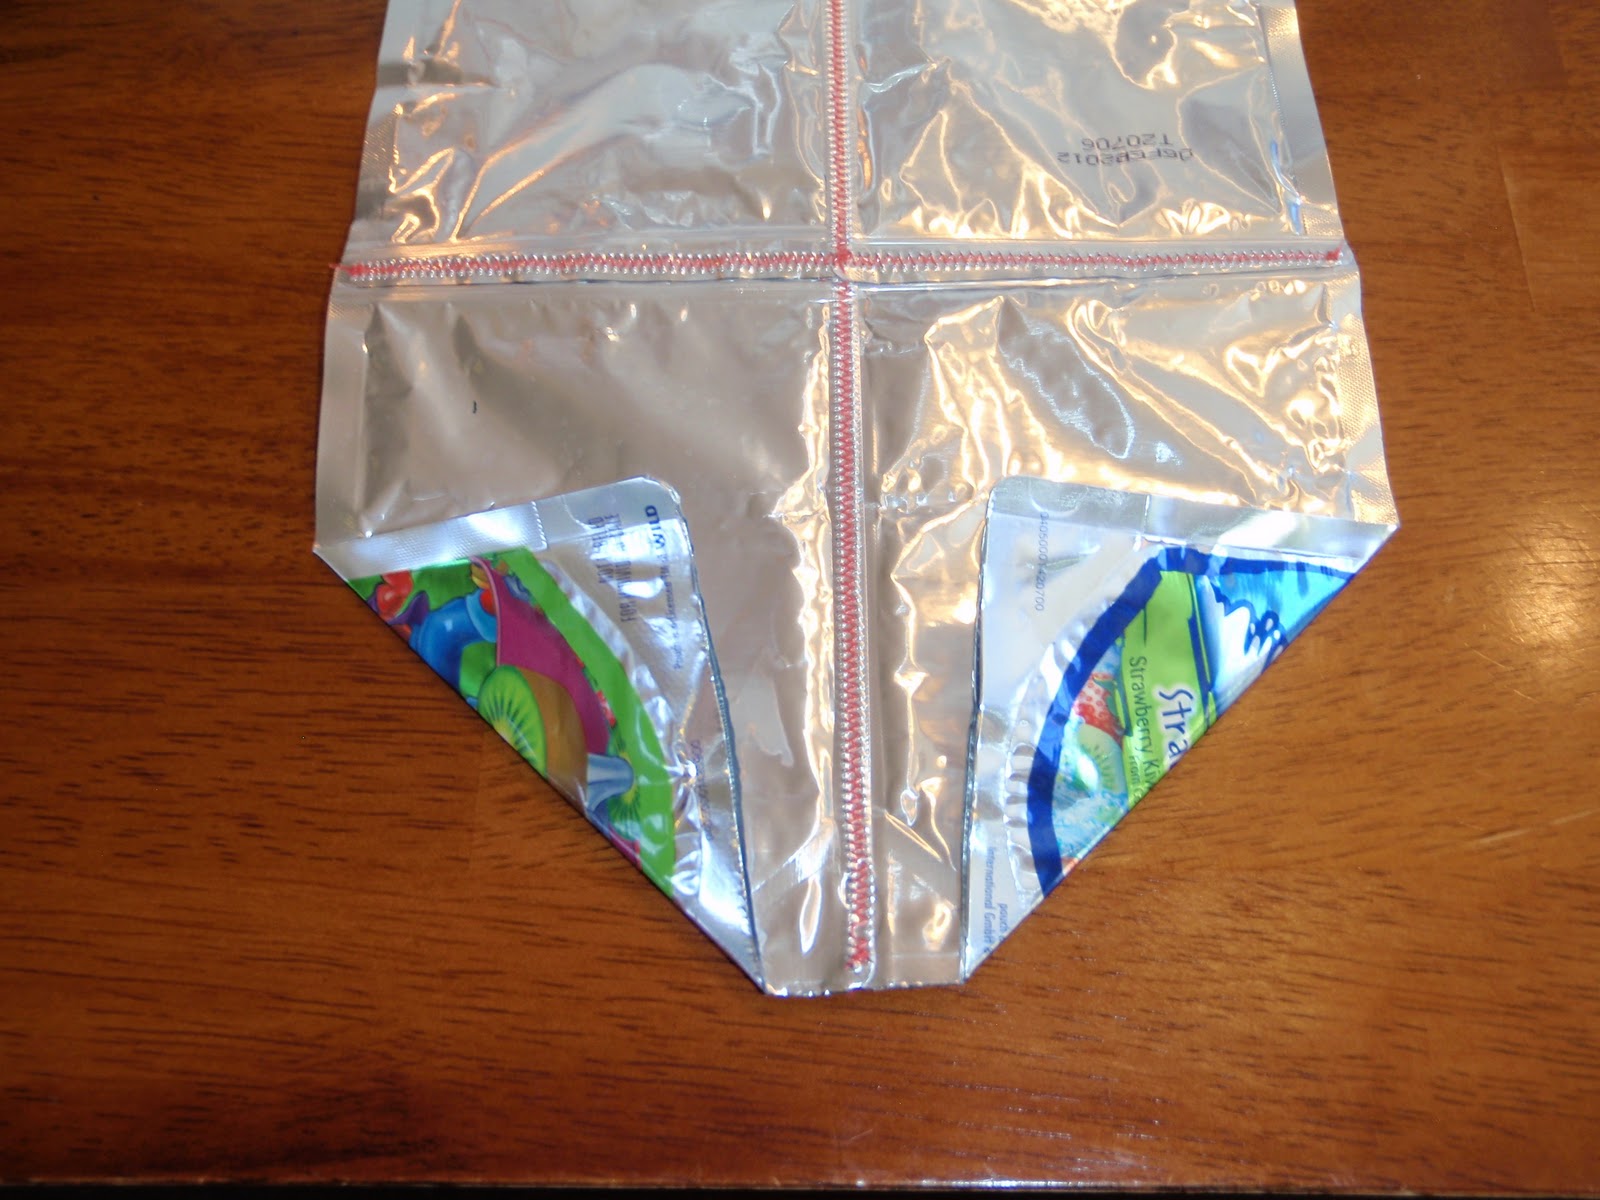
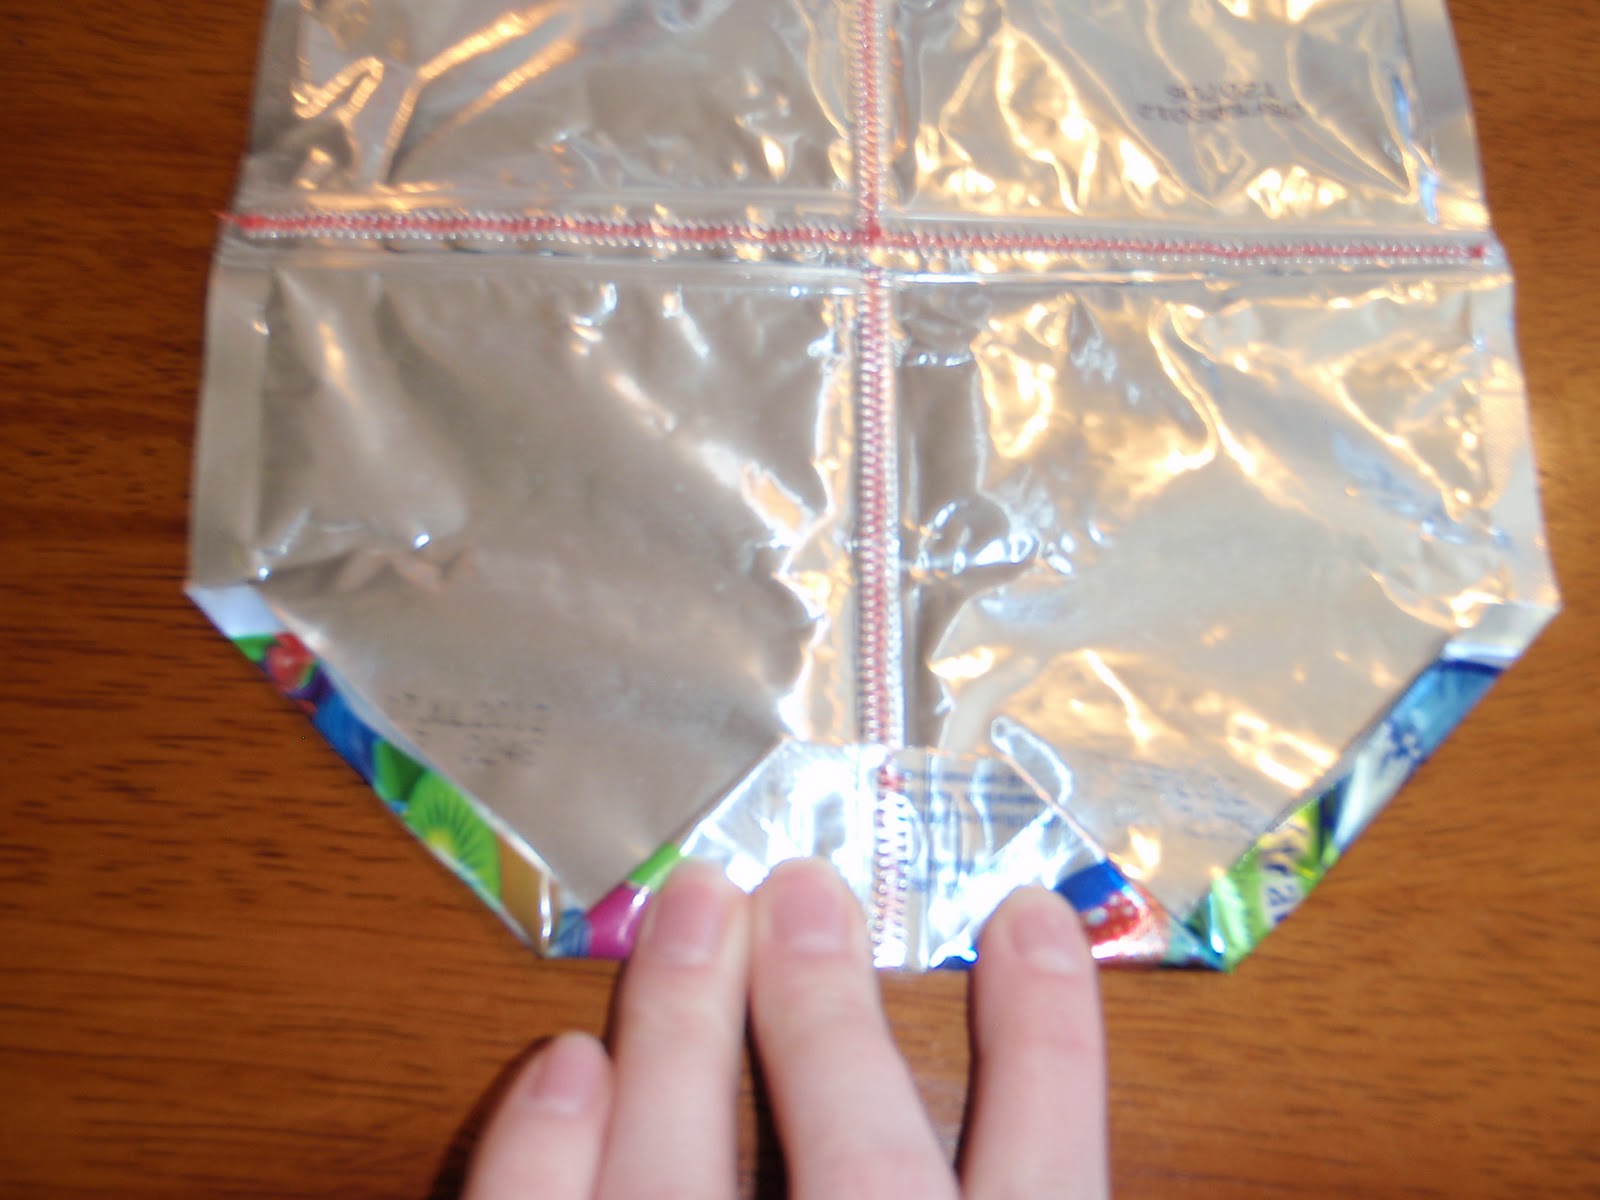
Pushing the bottom up so it folds diagonally, pinch the bottom of the sides together and line them up.


Fold any excess bag out of your way and starting from the top stitch the sides together.  Take your time and be careful to keep the sides lined up and DON'T stitch off of the bag! :)


Stitch all sides in similar fashion.  If you feel like you need more room for the bag, feel free to separate the extension table on your machine.


Ta-da!   Ta-da ta-da ta-da!  Your Capri Sun bag/tote is FINISHED!!!  Take a bow and admire your work.   Take a picture and post it on your facebook page.  You know you want to show it off and tell everyone how you learned to make it!   
GREAT Job!

See you again soon!
~Happy crafting!~

Monday, January 9, 2012

Tutorial: Michka's Capri Sun Purse

Yay! A tutorial by me! This is actually one of the reasons why I wanted to start a blog in the 1st place! :)  Get ready.... I'm including tons of photos, so you can't go wrong.  (And yes I'm double-jointed, so sorry if any pics depict my fingers bending weird- I tried to be careful! lol.)
   1st: Prepare your pouches


 I keep a bucket under my sink to stash pouches til I'm ready to prep. (Usually I'll wait to do this til I have at least 20 pouches.)
 Get your sink filled with hot soapy water and make sure all straw wrappers are removed.  Slit the bottom of your pouches open with a knife and plunge them into the water.


I let them sit a while......   Then rinse off and let them air-dry (this can take a few days, but you can dry them with a blow-dryer if you want).

Now on to the purse!
                           Supplies needed:  12 prepped pouches (11 &1/2 technically)
                                                         1" length of velcro
                                                         thread (I use the intended recipient's favorite color)
                                                         scissors                
                                        A glass of sugar-free punch (or your preferred beverage);)


Decide which pouches will go where- 2 for the front, 2 for the back, 2 for the front closure, 2 for the bottom/sides, and 4 (3 &1/2) for the strap.  I highly recommend looking over the entire tutorial before you begin, to be sure the directions are clear to you as you work.  If you are unsure about something- stop! Send me a question/comment and I'll respond back as quickly as possible.  It may look long and complicated, but the entire purse should take only about an hour to make (give or take).


Set up your machine with the above settings, using a zigzag stitch.  A size 16/18 needle for denim or other heavy "fabrics" will work fine.


Overlap the edge of one pouch over another and sew the 3 sets of 2- for the front, closure, and back.  Snip your excess threads as you go and throughout the whole project (but of course you already knew to do this).


Sew the "closure" set and back set together, overlapping the top edge.  Flip over and fold the corners over (on the front "closure" section) approx 3" (measuring from the bottom). 


Now fold the middle section up approx 1".


Unfold middle section and trim away excess pouch along the diagonal approx 3/8" from folded edge.


Sew along edge, being careful with the turn when you reach the middle section and back out again.


Now sew on 1 side/section of the velcro.


Sew the other section of velcro to the "front" set of pouches, approx 3/4" up from the bottom edge.


Cut the top edge off of your "front" set.  (The "closure" set will fold over and cover most of this when the purse is closed.)


Fold the top (now cut) edge down approx 4" and then fold up again, lining up the edges.  With the edge folded, it should now be the same height as the width of a pouch.  Adjust as needed and then sew across.  You can just sew 1 row if you want- I just like the look of having 2 rows. 


Your purse is starting to come together! Are you excited? You should be! Now on to the sides and bottom of the purse.  Cut 2 pouches in half.


I use the bottom halves and overlap them opposite-like to make a more sturdy bottom.  Plus I rather like the design element here:).


Sew the other halves on each side of the bottom piece.  I like to keep the color side as the inside of the purse, but you can use your own discretion.  ***Make sure you leave an unsewn margin of approx 3/8" on both top and bottom!***  You'll fold those out later and sew up on another step.


Before continuing on, it's time for the strap!  Cut your 4 pouches in half length-wise and using 7 of the 8 pieces (set aside the 8th for another purse or discard), arrange how you like in a row, keeping the cut edge all on the same side.  


I like to arrange mine top to top and bottom to bottom, but it really is just a matter of preference.  Sew the strap starting from one end and overlap from left to right.  This way you don't have the pouches bunching up in the crook of your machine.


Next I steal (borrow) my daughters' barrettes and starting from the center, I fold the strap into 3rds, placing the cut edge in the center.  (In other words... fold the cut side 1/3 the way in- the whole length, placing barrettes to hold it in place.  Then fold the other edge over- covering up the cut side). Resetting the barrettes as you go.


Now sew the length of your strap, removing barrettes as you work.  Flip around and sew on the other side.


Now attach the strap to the sides of the purse, being careful to keep the strap in the right direction and not twisted when you do the other side.  Sew 2 rows as shown above.  *For this step ONLY, I adjust the width of my machine from just below 3, to 5.*  Make sure you readjust back to the original settings on your machine after this step before you proceed ANY further.


At this stage it starts to get tricky (if it hasn't for you so far!), so just breathe and relax.  You can do this.  Carefully line up the bottom edge of your back/closure sets with the bottom of the purse, opening up the sides to get them out of your way.  Sew the length, again being sure to leave approx 3/8" gap on either end.
Once sewn, fold the closure/back out of the way.  Line up the other side- the front with the bottom and sew along the length again leaving a gap on either end.


All we have left is to sew up the 4 sides!  (Which is the trickiest part of the WHOLE thing, but you can totally do it!  Keep breathing, don't rush it, and you'll do fine.)
Pinch the bottom corner into a diagonal so you can line your sides up together nicely.  Start from the top and sew down until you get just to the fold- be careful not to sew on the fold!


These next few pictures just show me sewing the side edges up.  I thought I'd include a few so you could see from different angles.


See?  The above photo shows me getting ready to stop just before that folded bottom portion!  


Ta-da!!!  Fix your purse with all the folding and smooshing you did.  I bend the bottom sewn edge around so that the bottom of the purse is flat. (Hopefully that makes sense.)

Your purse is now finished!  YAY!!!!!  Jump up and dance and show everyone you can think of- you know you want to.  :)  And tell them how you learned how to do it- and that they can learn how too!


Before you give your purse to its intended recipient, be sure to dash to the $1 store (or wherever) and stock up on some goodies to put inside.  Load up the purse, wrap it, and present it to the child with pride! 

Let me know if anything is unclear or if you have any questions.  I'll respond usually within 12hrs!
Happy crafting! :)