
Time for more Barbie fashions made from beloved dead socks. Today we're taking a portion from the top of a long sock and making a sweet sweater.
Please note that all projects made using my ideas are strictly for personal use- Don't make money off me unless you plan on cutting me a portion of the profits! ;)
I loved this sock(you'll hear me say that a lot- I love ALL my socks) ;), and I thought the design was perfect for a Barbie sweater. The pattern was nice to use as a guide for cutting, but I measured as well with you in mind and that you won't be using the same sock!
First cut the top off at about 4". (When making this earlier you'll see I cut it at 4.5" but it was too long.)
Set the rest of the sock aside. We'll use it later in another tutorial to make a skirt and a dress! :)
The top finished edge will be our neckline. Cut the sleeves about 1/2" in on either side. -My sock was about 3" wide when I lay it flat, and with the sleeves cut it left about 2" wide for the bodice.
Turn the sock inside out. It should look something like this.
Hem the bottom of the bodice, folding up about 1".
I just used a straight stitch- it may not necessarily be the best method- I'm not a pro! If you prefer to use a different stitch- perhaps a zigzag, be my guest.
Repeat with the other side.
Trim away the excess material.
Next we'll cut the sleeves. I found on my 1st attempt that long sleeves were a BEAR to get on the barbie, and the angled cut looked more pleasing to me anyway.
Cut 2" off the sleeves.
Next, cutting from about 1/2" down, cut at an angle to the middle forming a triangle. With my sock I simply cut along the diagonal pattern, but I'm aware the sock you're using will probably have a different design.
If you lay out your sweater it should look something like this. We're almost done! We just need to sew up the side seams of the bodice and sleeves.
Grab some pins if you please.... (Yes I use one of my daughters' stuffed animals as a pin cushion! Every so often they'll want it back and will trade me for a different stuffed animal to use. I really should make myself a cute normal pin cushion... lol.)
Line your edges together, especially being careful with the armpits, and pin in place.
Starting at the edge of one sleeve sew towards the armpit. Try to sew as close to the edge as you can, since we don't have any material to spare on this one.
Pivot at the armpit and continue down the side of the bodice.
Be aware that the hemmed edge is pretty thick and you may have a doozy of a time pushing your project through. Just breathe and you'll get it ;).
Repeat with the other side starting again at its sleeve.
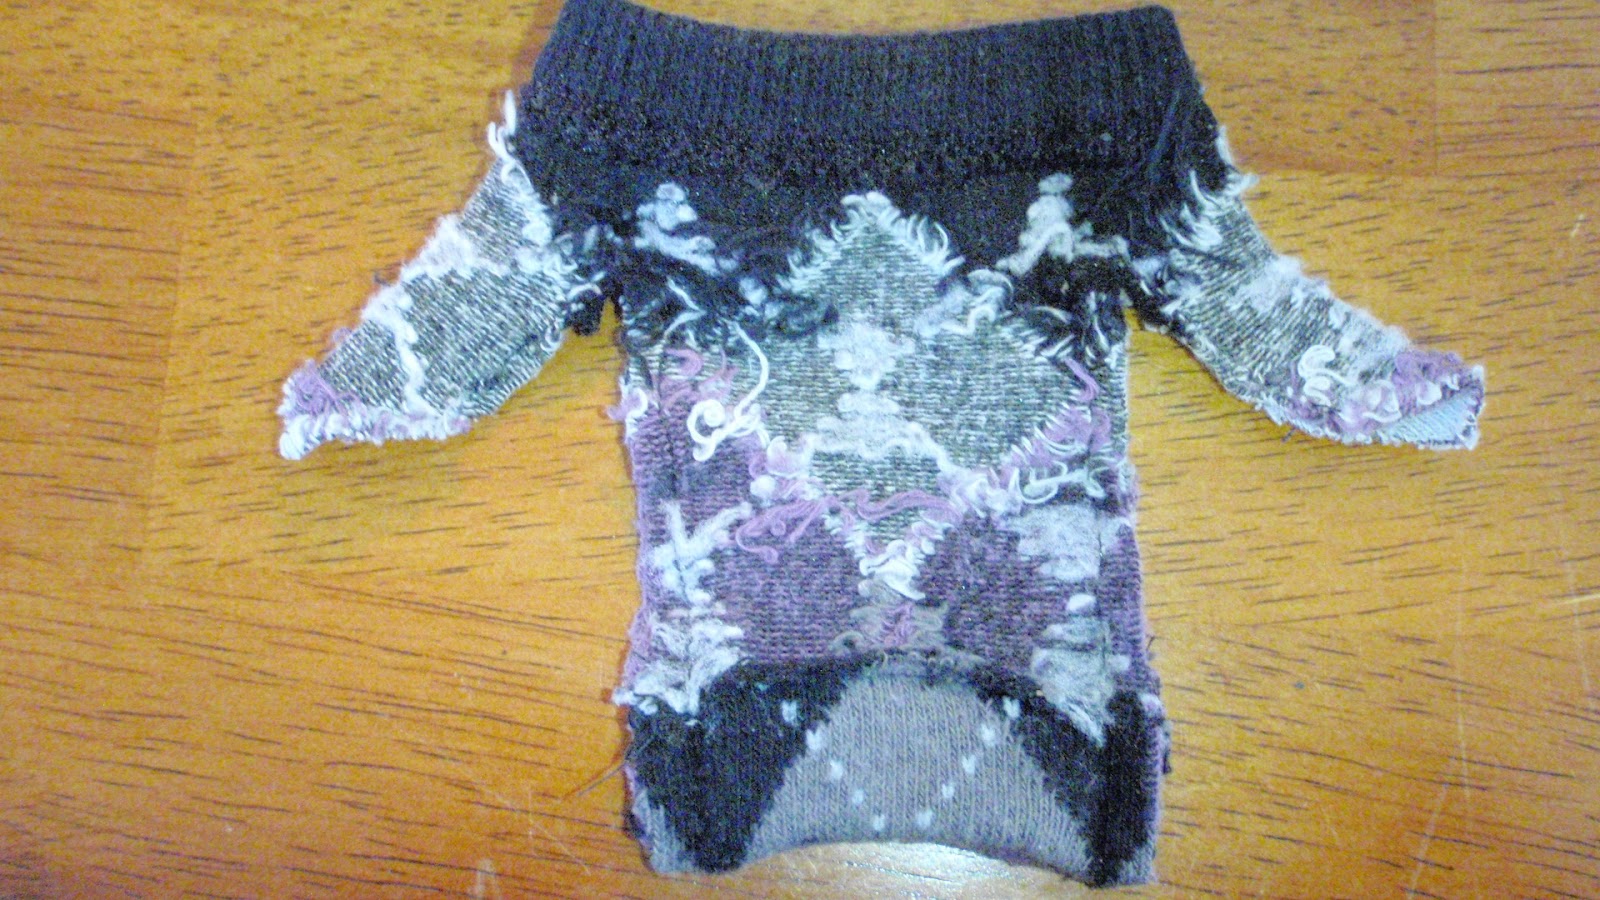
Your sweater should look something like this.
Turn the sweater right side out again. I had help with the sleeves using one of my crochet hooks ;).
Now because the sleeves are pretty narrow AND sock material usually has a lot of stringy-ness, it can be really tricky getting barbie fingers through the sleeve, so I made a device to help me out! Just grab a plastic straw (I only had narrow ones- if you are out and about, you should grab a fat straw made for slushies at the gas station.) I cut the straw into 2" pieces and then cut a triangle out off the end of each. Tape them together with the triangles facing each other.
It's easiest to slide the sweater on going up the legs.
Stuff the Barbie's hand into your straw contraption and slide into the sleeve.
Repeat with the other side (obviously).
Once on, your Barbie will be styling!
If she could talk, I'm sure she would thank you and applaud you for such a well-done job. ;)
View from the back.
I tried it on another smaller doll and as it stretched while pulling it on I thought it could work as a dress too. I'll have to make another and simply make the hem longer. Tied with a ribbon around the waist, she feels so pretty! (Although that is a LOT of leg!)
Enjoy your work and pat yourself on the back. Show it off to your family and friends, being sure to tell them where/how you learned to do it. ;)
Next time we'll use the remainder of the sock making a simple skirt and a cute dress.
Happy Crafting!

 Time for more Barbie fashions made from beloved dead socks. Today we're taking a portion from the top of a long sock and making a sweet sweater.


Fabulous tutorial and a well dressed Barbie...
ReplyDeleteHi Michka, I wanted to let you know that I tagged you in my post today. Here's the link if you'd like to play along...
ReplyDeletehttp://threadingmyway.blogspot.com/2012/03/blog-tag-im-it.html
Please don't feel obligated to play along. If you would rather not participate, that is totally fine. No pressure; it's just a bit of fun!
If you do play along, I look forward to reading your answers. Have a great weekend!
Yay! I am LOVING the generous gobs of positive feedback you've been giving me! Thank you so much! It feels great knowing my ideas are appreciated, and that my new little blog is actually starting out pretty good(- I've wondered). I'd love to participate with your tag along. :)
ReplyDeleteWhat cute barbie outfits! I especially love the picture you take and the clear language you use to describe each step. Keep up the great work!!!
ReplyDeleteHi there! Do you use Twitter? I'd like to follow you if that would be okay. I'm definitely enjoying your blog and look forward to new posts.
ReplyDeleteTake a look at my site: book of ra tricks
Lovely! I have been making clothes (mainly dresses) with socks for Monster High dolls, but using the socks inside-out. The patterns are great for those dolls, and such fun to choose the pattern area to use.
ReplyDeleteLovely! I have been making clothes (mainly dresses) with socks for Monster High dolls, but using the socks inside-out. The patterns are great for those dolls, and such fun to choose the pattern area to use.
ReplyDelete